Monday, December 30, 2013

Mason Jar Monday - Mini Light Covers

Yule was wonderful this year. I hope that everyone has had as wonderful a holiday season as I have. This past week has been spent with good family and friends, exchanging gifts, sharing meals, and visiting.

I was gifted with a great Mason Jar Monday idea: Mini Mason Jar Light Covers. Each vintage-style glass jar has a "ring" at the top where the jar seal should be on a real jar, there is a rubber piece that has an X cut in it. You just push a mini light into the jar.

The glass has a slight green tinge with bubbles in the glass, just like the vintage ones. They even read, "Mason Nov 30th 1858" on the glass. These are just adorable and the way the lights shine through them is beautiful. Each one measures about 3" tall and 1" in diameter.

I plan to hang these over my kitchen sink for a little additional lighting in a sweet country style. These are not inexpensive by any means, coming in at around $4 a jar, but I think they are well worth the investment. I was lucky enough to be gifted with two dozen! I am going to use them in the kitchen and in the living room. They provide lovely ambient light. I use LED lights that are battery operated so I can put them just about anywhere I want them.

Interested in buying some? You can find them here on Amazon.

Best wishes for a safe and Happy New Year from Rancho No Dinero!

Sunday, December 22, 2013

Grey Water Friendly Cleaning Products

I have immersed myself in the world of grey water and black water and have found that there is a ton of information out there that conflicts. Ugh! It is clear to me from all that I have read that grey water systems are, for Americans, in their infancy. While grey water is common in third world countries, we also understand that those systems are not always by choice and the folks using them are, more often than not, not aware of how damaging the products they are flushing out in their water are to the earth around them. Survival is their focus, not being Earth-friendly. However, here in the US and in most developed countries, the choice of grey water is a smart and Earth-friendly choice providing we understand just what constitutes grey water friendly and what will make waste water black water and not Earth-friendly. So, with the goal of understanding what can and cannot be used in your grey water system, I will break down the areas we use products in and what you can safely use and flush out in your grey water system vs what products will need to be considered contaminants and must be flushed out in black water containment systems. We will begin with basic cleaning products in this post.

One specific area to pay special attention to is laundry. This area is of particular concern for me because, other than draining a bathtub, it is going to be the largest contributor of water to my grey water system. I used to like to make my own laundry detergent, but I have discovered that Borax is NOT grey water friendly. My recipe calls for Borax. The reason it is damaging to the environment is due to the raising of the salt level of soil. Basically it causes the soil to become non-plant friendly and that is definitely counter-productive to the purpose of the grey water system. As a result of learning this, I will have to revisit how to make a home-made laundry soap that can be used in a grey water system.

On a positive note, my research has led to discovering a plethora of products I can start using now, forming good habits for when I am ready to move onto the homestead. Here are the product lines I have found most compelling based on availability, costs, and reviews:

Ecos:  Ecos makes a liquid laundry detergent that has a built in fabric softener. The price is fair (I found it here on Amazon in a six-pack that will wash 384 loads. Divided into the cost, it comes out to a little over 10 cents a load. A very fair price for an eco-friendly product.) and they have several scents that are popular in addition to a free-and-clear version. Add in free Prime shipping and it is an even better deal.

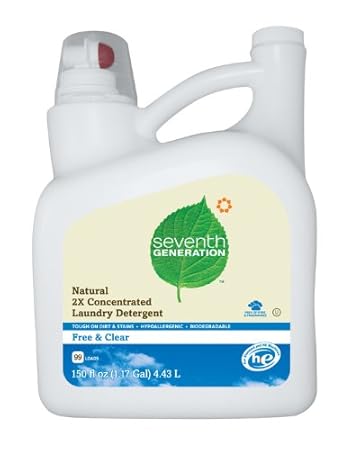
Seventh Generation: Seventh Generation is a well known brand of cleaning products sold in most larger health food stores and markets. I find that their product is good, works well, and is both grey water and septic system friendly. However, it is quite expensive (about double the Ecos cost per load). Visit their website to learn more and to sign up for coupons and specials. www.SeventhGeneration.com.

Soap Nuts
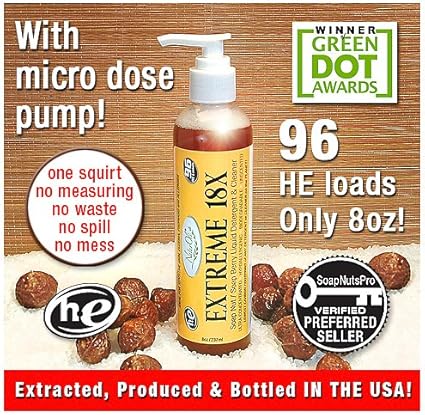
: NaturOli makes a tremendous line of Soap Nut products. Soap nuts are the seeds of a tree and are a 100% natural surfactant. They clean and leave no residue or smell. Highly concentrated, the cleaners are sold in small bottles that take up very little space and can be reused or recycled. You can see their line of products at their website: www.NaturOli.com or directly to their soap nut product line at https://store.naturoli.com/soap-nuts-liquid/ or look for their products on Amazon. If you have a front loading washing machine, you really need to look into using soap nuts. Soap nut products are safe for grey water systems as well as septic systems. Using their Extreme 18X product for laundry comes out to about 16 cents per load. An 8oz bottle will wash 96 loads in an HE front loading machine. The product can also be used as a chemical-free household cleaner and is safe for body and hair too!

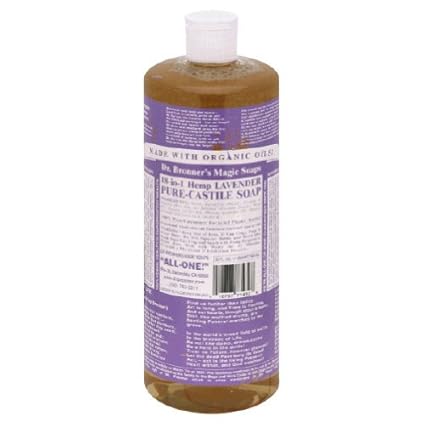
Dr. Bronner's: Dr. Bronner's products are castille based soaps. While there is nothing on their site that specifically states that their soaps are grey water friendly, castille soap is naturally based and all the chat rooms and boards that chatter about grey water all recommend Dr. Bronner's liquid soaps. Dr. Bronner's site has a list of 18 ways to use their liquid. Eco friendly and sold in bulk, Dr. Bronner's is a serious contender. www.DrBronners.com

There are some other products I have found, but they are high-priced or obscure. To make real change I feel that products must be  accessible, and, most importantly, reasonably priced. I chose to double-check if I could easily locate items on Amazon since living in a rural area often limits shopping choices. Being able to be order things to be delivered at a reasonable cost just makes sense. I am also aware that many are proponents of using vinegar. I agree that vinegar is eco-friendly, but it is not cost effective over the long haul and is stored in large containers.

Do you have any eco-friendly products you stand by? Share your experiences with us in the comments below.

Tuesday, December 17, 2013

Grey Water vs Black Water Part 1

Over the course of my next few posts I will be explaining my plan for my grey water system (also spelled gray water), its limitations, and its benefits. If you have been interested in or are considering a grey water system, you may find my research helpful. Please feel free to ask questions and add to the discussion in the comments below. I welcome any feedback you may have.

I have been designing the plumbing system for my new home to be efficient and green. There are several factors that will play into how one designs and executes the plumbing in a shouse, such as: A) where kitchen and bath are located, B) sewer or septic, C) codes, and D) pipe or Pex. You would be surprised how complicated it can be to design your own system. A couple of these factors were already decided for me. First, my property already has a septic tank installed and, secondly,  I am installing a composting toilet as opposed to a flushing one.

One thing that has always been a non-negotiable for me in designing my plumbing is my desire to install and use a grey water system. Grey water is generally water that comes from bathing, washing dishes, and laundry, that is used to water the yard. It does NOT include water from the toilet. Some areas do not allow for grey water use (check with city and county codes where you live) because they simply don't trust people to use the system safely. It is more complicated than just running a drain line out into the flower bed, which is what many people think is how a grey water system functions.

The most basic of grey water systems is using a basin to wash dishes and then walking the water out to the garden to water plants. While this is an excellent way to reuse dish water, there are factors that must be considered or what you pour into your garden may just kill your plants. Draining washing machine water from a load that was used to wash diapers is also considered bad news. Feces is the enemy of the grey water system. Your job in designing your grey water system is to ensure that feces doesn't make it to the garden and that bacteria and germs are not encouraged to fester.

When I began researching this idea I found that lots of information is out there, but much of it is impractical and/or outdated. After sifting through all the detritus found on the net, I have narrowed my system down to this:

  • Water from the kitchen sink, bathtub/shower, bathroom sink, and washing machine will all be routed to grey water pump, which will then pump the grey water to a mulch bed away from the Shouse. 
  • The mulch bed will be built using trenches to run the pipe, Y's to branch the pipe out, and then the pipes will dead end in specific mulch beds. 
  • The mulch beds will be next to trees and garden beds to assist in irrigating them. I will NOT be watering root based vegetables with grey water. 
  • A diverter will allow me to run the drain water into the septic if there is any chemical (bleach for example) or feces potential (washing diapers or a poopy kid) in the water. 

While this is a very simplified overview of my grey water system, I will be going into detail about it in the next few posts. There are some definite considerations when considering a grey water system, but the most important is SAFETY. Not breeding bacteria, germs, mosquitoes, or creating a drowning hazard must be built into whatever system you settle on using. Also, you must consider how much water your household uses on a daily basis. Too much water can be as bad as too little. The size of your system must be proportionate to your water usage. My next post will begin with what kinds of cleaning products can safely be used in a grey water system and which ones should be diverted to a sewer or septic system.

Do you use a grey water system or recycle your water in some way?


Monday, December 16, 2013

Mason Jar Monday - Cross Stitch Jar Covers and Inserts

Plastic Canvas Insert
Mason Jar Monday would be remiss if it didn't include showing how to label jars in some decorative way.

I stitched up this jar lid insert over the weekend. This jar's purpose will be storing all the nails, screws, bolts, picture hangers, etc. that end up in a junk drawer in the kitchen. By storing them in a jar such as this, I can easily see what I have and pour out the contents when I am ready to sort them. This particular insert is made from 14 count plastic canvas (sold for 99 cents at my local craft store) and was stitched using a pattern leaflet I purchased on Ebay. I chose to make the insert out of plastic canvas because it is less likely to become soiled and, if it does get dirty or dusty, can be washed gently in soapy water and laid out to dry. I prefer plastic canvas to aida cloth for any application which 1) I want to reuse and 2) which has the potential to get soiled. It is sold in colors, a clear look, and plain old white.
Slip on Jar Cover

There are many ways to decorate/label your jars to use them for more than just jelly or jam storage. I purchased a dozen slip-on style jar covers for just $5 on Ebay. I stitch one up whenever I need a nice presentation for a jar gift. The chicken cover was a gift for my "Secret Santa" exchange at work and was a big hit. I also discovered a co-worker who enjoys cross stitch, which was an added bonus.

Rachel over at Paper Doily has posted this easy first-try cross stitch pattern for those of you looking for a quick something to whip up as a gift. Although Rachel stitched this up as an easy ornament, this would make a great topper for a small jelly jar to store ornament hooks. If you like it and/or use it, please stop by her blog, Paper Doily, and give her a howdy and a shout out!


Not someone who enjoys needle crafting? You can print out labels you design. Avery (www.Avery.com) sells print-to-the-edge round labels that can be used to label the lids of canning jars. There are also ones that go directly onto the glass. With free templates found on the Avery site, you can jazz up any plain old jar.

Happy Crafting!


Sunday, December 15, 2013

Electrical, Plumbing, and Insulation, OH MY!

Yesterday I had a chance to speak with the builder of the shouse buildings at length. I told him my ideas and we batted around numbers. Here is what I think I have discovered:
1. I am going to have to run my own electric.
2. I am going to have to run my own plumbing.
3. I am going to have to do my own insulating.
4. I am going to have to do my own wall board.
The gentleman I spoke with was very helpful, but the numbers would far exceed my budget (especially since I really want 2 buildings), and so I think that I am back to running all the wiring, plumbing, and insulating all by myself. At first I found this revelation greatly intimidating, but now I realize that if I wasn't such a careful planner, that might be true. However, knowing I will have a plan in place before I ever leave the Phoenix area, I know that I can do it and I will do it well.

So I am going to sit down and re-figure all the supplies I will need to accomplish these tasks and formulate my plan of attack. Stay turned for posts on my discoveries with all of these important systems. Meanwhile, I think I will be doing lots of reading.

Friday, December 13, 2013

Pet Food Storage

I have a dog and a cat. Both are deaf. The cat is blind as well. AND the cat will only eat dog food. The dog will eat anything. He is a fatty. To save on costs, I purchase large bags of dog food and refill an airtight storage container that is slim and slides in between the pantry wall and the refrigerator. It is not attractive, but it works well enough. This is what it looks like:


I would describe this container as utilitarian. It does just what it is designed to do, no more, no less. However, in my Shouse I will not have the clever stash space to slide this into. Last night while out holiday shopping I stopped in at my local World Market. This place really has some great finds from around the world. I actually popped in to pick up a bottle of Muscato for my Secret Santa exchange at work, but, of course, had to walk around. That is when I found this:


This large canister holds 20# of dog food and stands 15" tall x 12" in diameter. The lid fits snuggly and the scoop is included. The photo really doesn't do this justice. It is a lovely creamy white and has a brown lid. The entire can is metal. The best part? The price is $24.99 on sale right now (you save $5). You can order it on their website at http://www.worldmarket.com/product/pet-food-canister-wscoop.do?from=ac . This cannister allows me to hide a good quantity of dog food in plain site. It has a nice homey feel and will blend into my decor very well.

So, if you are looking for a great gift for the pet lover in your life, you should consider one of these. I am sure I will be using it for years to come.

How do you store your pet food?


Thursday, December 12, 2013

Ceiling Fan Direction to Help Heat and Cool

Ceiling fans are a staple in Arizona. I have one in almost every room of my house and I plan to have them in the Shouse as well. Many folks do not know that a ceiling fan not only helps you feel cooler in the summer, but warmer in the winter as well.

During the summer months a fan should be set so the blades turn counterclockwise. They should be set to turn quite rapidly as this helps to push the air down. Airflow from a ceiling fan can make a room feel as though it is 8 to 10 degrees cooler than the room actually is. This is due to the wind chill effect. Ceiling fans can help reduce your air conditioning bill by as much as 40% in the summer months.

During the winter a fan should be set to turn the blades clockwise and at a slow rate. This creates a gentle updraft which pulls cooler air up and forces the warm air that rises and is trapped at the ceiling to move down, thus making the room warmer. By setting the blades to turn rather slowly, you do not create the wind chill effect, but move the air from the ceiling down the walls. Running your ceiling fan in this manner in the winter can help you save up to 15% on your heating costs.

If you have very high cathedral ceilings like I do in my living room right now, you do not need to switch the directions as the height of the ceiling will negate the wind chill effect. The speed will help force the hot air back down and keep the air circulating up by the ceiling.

You can adjust the direction of blade spin on your ceiling fan from the remote if your fan has one or on the fan housing itself. There is a small switch on the fan housing.

If you don't own a ceiling fan, you should consider installing one in each of your most frequently used rooms. They start at around $15 and pay for themselves in a very short period of time in both heating and cooling savings. Ceiling fans are relatively easy to install and provide years of hassle free use.


Wednesday, December 11, 2013

Saving On Heating Costs From the Comfort of Your Bed

Heating Mattress Pad 
I woke up this morning around 4 a.m. for some reason. Not quite awake, not quite asleep, but aware that the air in the room is cool and the bed so nice and warm. Curled up beside me is my cat, who I like to refer to as the space heater, warm and snugly as well. It got me thinking about heating blankets and how wonderful they are. It also inspired me to write about the cost savings for those who use them and turn down their thermostat at night.

I discovered the Electric Blanket Institute (yes, there is such a place) at http://www.electricblanketinstitute.com/features-benefits/actual-cost-to-run.html has a wonderful bit of information about just how much the estimated costs of running a heating blanket and/or a heating mattress pad. I thought I would share that with you today since the holidays are rapidly approaching and you might want to consider adding a heating blanket to your wish list.

Actual Cost To Run
Electric Blankets or Electric Mattress Pads

Federal Government Ranking of Appliance Energy Usage

How does electric blanket energy compare to that of other appliances? The United States Department of Energy rates a heated blanket as the most energy efficient appliance in your home.
Electric Blanket Energy Usage
Source: US Dept. of Energy booklet “Energy Savers – Tips on Saving Energy and Money at Home” October 2008


Electric Blanket Energy Usage – Actual Cost to Run

People often ask us how much energy does a typical automatic blanket use or how many watts do electric blankets consume. Do not be confused by the manufacturer’s rating-tag wattage. Many manufacturers artificially over-state their products’ wattage rating in order to imply more heat and to assure that they will never exceed UL’s stringent requirements on ratings. In fact, all warming blankets consume only around 75 – 100 watts (per side on Dual controlled models) when used on HI. However many people set their controls around #5 or lower thus effectively halving that wattage to 40 – 50 watts. For eight hours, this amounts to approximately 0.35kwh consumed or about 4 cents per night in most areas of this country.

Heated Mattress Pad Energy Usage – Actual Cost to Run

Additionally people ask us how much energy or wattage do typical electric mattress pads use. Again, do not go by the rating-tag watts. When actually measured, most warming mattress pads consume around 60 to 90 watts (per side on Dual controlled models) when used at HI. Inherently, electric mattress pads are more efficient than electric blankets because ALL the heat of the pad is trapped in the air space under the top sheet and top blanket, whereas much of the heat generated by an electric blanket travels upward to the ceiling of the room. Many people set their pad controls around #3 thus effectively cutting wattage consumption to only 20 watts. For eight hours, this amounts to less than 0.2 kWh consumed or about 2-3 cents per night in most areas of the USA.

Heating Cost and Energy SAVINGS from
Electric Blankets and Heated Mattress Pads

Saving Energy and Heating Costs

Are you trying to lower your heating costs and save energy? How can electric blankets or heated mattress padsElectric Blanket Energy Savings save energy or save you any fuel costs? It’s because you can turn your house furnace thermostat down while you sleep and still stay warm and comfortable in your bed. Obviously it costs a lot less to heat beds than whole houses. We've heard it asked: Why would I want to heat my kitchen when I'm asleep in my bed?
Conservatively, in most parts of the United States, you can save 1% of the house-heating bill for EACH degree the furnace thermostat is turned down for a period of just eight hours! In some cities, 2% or more per degree setback can be saved. Thus, for example, if your heating bill is $200 for one month and you turn your house thermostat down by 10 degrees just while you sleep you will save $20-$40 in your heating costs during that one month! Therefore, your electric blanket or electric mattress pad product will pay for itself quite quickly in energy savings. Note: You can easily install a programmable thermostat and set it to warm your house just prior to awakening for total comfort.

Real Life Examples from Trusted Authoritative Sources

A very good article demonstrating actual energy savings can be found in the February/March 2008 issue of Mother Earth News®. The author shows how he spent $125 for a warming mattress pad and saved $186 the first year in energy savings, not to mention a CO2 reduction of 1150 pounds. He further estimates his 10-year heating cost savings due to the electric mattress pad at almost $3000! What a payback not even counting all the comfort and health benefits he gained! Check out that Mother Earth News article here.
Another trustworthy article recording actual energy savings can be found in a forum moderated by Alan Graham, liaison for the Discovery Channel's Treehugger where Mr. Graham states he paid for his electric mattress pad with two months of home heating savings. He says he further benefited by never getting a chill during the night while also helping to save the environment.
A very similar story is documented at Planet Green and in January of 2009, Consumer Reports stated that the average American household would save $233 per year by lowering the home thermostat 8 degrees for 8 hours per day 25 weeks per year.

So, as you can see, investing in a good heating blanket or heating mattress pad is definitely something to consider. While not an inexpensive investment, the rate of return is rather fast, being less than one winter season. You can sleep well both warm and knowing that you are doing something comfortable and healthy for you as well as wise for the environment.

Do you currently own a heating blanket or heating mattress pad?

Tuesday, December 10, 2013

Lost and Found Blogs

Last night I was searching through old emails to locate the contact information for the person who designed my logo for a podcast I produce. I came across an email confirmation for a Wordpress blog I started in 2010 and then promptly forgot about. Shortly after starting the blog I moved houses and I guess the blog just got trumped by all the drama of relocation and settlement. I find it rather sad. Somewhere out in cyber space is another webpage I started that is my first ever bucket list. I have no idea where that is, but finding this old blog has really got me thinking. How long do blogs and webpages that are not updated hang around on the web?

The scary answer is FOREVER. They simply don't "expire."

Most blog host sites that offer free blog space will not fry off inactive blogs. There are some rare exceptions to this rule. A good example of this is Geocities. I remember when I first started teaching Geocities was the most popular place to get a free teacher website. I started one and occasionally updated it, but eventually I switched schools and, out of site out of mind, I forgot about it. Geocities was eventually sold off, absorbed, tweaked, and ultimately 38 million individual sites were fried off when Yahoo, the company that acquired Geocities, decided to change the format. Geocities is only in existance in Japan now and my original website from 1999 is long gone. This is not unusual, but unless the actual website closes, chances are your stuff will still be chilling out there in cyberspace incomplete and lonely, just waiting for you to remember or rediscover it.

Despite my best efforts to Google myself and whatever I thought I named my bucket list, I cannot locate it yet. I am not too concerned as I have a more modern, updated version, but the idea of this internet detritus got me thinking about just how many abandoned or forgotten blogs there must be out there. The sheer number of websites and blogs out there that are lonely and not updated simply because they are forgotten is mind boggling. Estimates are that there are 12 million bloggers. Of the blogs created, 60% to 80% are abandoned within the first month. Most that are not abandoned are just updated sporadically at best, and then, with content that average reader has no interest in i.e. personal travel, family updates, etc. I found a great site that has research data about blogs and blogging at http://www.caslon.com.au/weblogprofile1.htm which made for very interesting reading. I have found my forgotten blog is not alone by any means.

Will I ever find my original bucket list? Probably not. Do I really care? No. But I kind of look upon abandoned blogs as the trash of the internet. Who is going to clean up all this scrap? Arguments are they are like the library at Alexandria and no one should. We are free to use it for historical documentations. Snapshots of our modern times. Material ripe with our culture so that future generations of users can better understand those that came before. Whatever. I guess I will just add "Find my original bucket list" to my current bucket list.

Sunday, December 8, 2013

Mason Jar Monday - Easy Pasta Salad for a Quick Meal

Happy Mason Jar Monday! Today's Mason jar idea is actually a quick, easy, and economical meal option that you cook up and store in a Mason jar. You can make enough to have a quick lunch for a week or you can serve it as a side dish.

This dish most likely can be made from items you already have on hand. Servings cost less than a dollar! Also, this is quick. Cooking time is around 9 minutes (follow the box for the pasta you choose) and it just needs to chill for a bit in the fridge. So simple!


You will need:
Elbow Macaroni or Mini Penne Pasta
Salad Dressing of Your Choice (I like to use Ranch or Balsamic Vinaigrette)
Shredded Cheese
Salt and Pepper
Yum! 
Directions:

  1. Cook your pasta following the directions on the package
  2. Drain it well and rinse with cold running water. While macaroni is still in the colander, use a spoon to stir the pasta to allow water caught up in the hollow part of the macaroni to drain.
  3. Add 1 tablespoon of dressing for every 1 cup of pasta. You can add more or less to taste, but I found this ratio to work pretty well. 
  4. Shake a little cheese on there and add salt and pepper to taste. 
  5. Stir it up well. 
  6. Spoon into jars, put on a lid, and chill in the refrigerator for at least an hour before serving.

Store up to one week in the refrigerator.

Do you have an easy recipe you would like to share? Share it in the comments below!

5 Reasons You Need a Thermos

Old School Thermos - 1950's
This morning is again chilly and I put the kettle on to make myself a nice hot cup of tea. I thought about all the energy a stove uses to heat up the kettle and how so much of that energy is wasted when all I pour is one cup. I know I will be back later for another, but for now I only will pour one cup which will require me to heat the water again. Then it occurred to me that I have an old-school Thermos. In fact, I have two. I fetched one out, dropped a tea bag in, and filled the container with the remaining hot water. In two hours I will still have a cup of hot tea. In four hours I will have another cup of hot tea. This one time heating water will keep me enjoying my drink all day long.

Thermos is actually a trademarked name for a style of insulated bottle meant to keep liquids hot. The word Thermos was derived from the Greek word therme, meaning warm. Thermoses  (Yes, that is the plural form of Thermos. I looked it up.) were invented in 1892 the brainchild of an Oxford University Scientist named Sir James Dewar. He initially named his invention a "Vacuum Flask." In 1907 the rights to the thermos were sold to several companies, but The Canadian Thermos Bottle Company really were the ones to put the glass lined bottles on the map by outfitting several explorers with the bottles (yes, the pun was intended). The Shackleton Expedition famously carried Thermoses as well as the Wright brothers taking one with them for a nice warm drink in flight (minus the stewardess reminding them to put their seat back in the upright position and making sure their tray table was secured).

Modern Thermos w/12 v. Heat Element
By 1911 Thermoses were in high demand and the technology was developed to allow machines to make the glass liners. Production could be greatly increased. By 1923 new models were being introduced to the marketplace that were larger and able to store more of the fabulous hot stuff we so love on a cold day. But wait, they were not just for hot liquids, but stored cold liquids like no other as well. Since this was prior to the invention of electric refrigeration, they were highly prized for storing things like ice cream and even frozen fish! Thermos bottles were used for all types of things including transporting scientific instruments, medications like Insulin, and even blood products such as plasma.

The next significant technology advance made using stainless steel in the creation of the bottles. Later they would introduce plastic versions that many of us had in lunch boxes in the 1970's and 1980's.  In 1986 The Coffee Butler was introduced to keep coffee warm and sales greatly increased yet again. Ever been to a restaurant where they bring you a pot of coffee they leave at your table? You can thank Thermos for that too!

Yup, hot tea in the morning!
Sales of this old standby have never significantly decreased. So why is it that I never thought to use this in my house on a daily basis and not just when on a long car trip or in my lunch box? Think of the energy wasted reheating a kettle for just a cup of tea here or a cup of instant coffee there. I think I will get in the habit of pouring my pot of coffee each morning into my Thermos. Hot coffee all day? Cold ice tea all summer? Soups and stews steaming hot when I am ready to eat? Oh yes! I would even go so far as to say that when winter storm warnings are in affect, a nice thermos full of hot water might be a good thing just in case the power goes out. Hot water could save your life if you were stranded in your car due to snowfall.

So the 5 reasons every household and homestead should have a Thermos or two:
1. Saves energy and fuel. No keeping the coffee pot heating all day. No reheating the kettle for just one cup.
2. Hot liquids could save your life if that power goes out during a snow or ice storm.
3. Hot stew, soup, coffe, tea, cocoa, etc. are all much better hot, not lukewarm. Left-over's don't seem so left-over-ish.
4. Cold foods stay cold in a Thermos. Foods don't spoil in the hot sun on a picnic. Ice tea is still ice cold. Soda will keep its fizz.
5. Thermoses make it easy to sit in bed on a lazy Sunday morning enjoying hot tea and writing blog posts without having to run to the kitchen for a refill.

Do you have a Thermos? Do you remember having one as a child in a lunch box? Share your Thermos experience with us!


Saturday, December 7, 2013

Found Treasure - Welsh Carved Love Spoon

Searching my local thrift store for a treasures, I came across this unique wooden spoon that is clearly hand carved. I pick it up for just 25 cents and made it mine. I intend to hang it in my kitchen as a symbol of luck carrying on a tradition passed on in my family by my grandmother and my mother. Hanging a spoon (or spoon and fork set) is supposed to bring luck in to a home's kitchen. I like the idea that this little treasure will help add some luck to my magical household. It is also a nice little country touch.

As I sat here looking at it, I wondered about who carved it. The initials B.M. and '03 are carved into the back of the spoon. I couldn't resist poking around on the internet about carved wooden spoons. Imagine my surprise when I discovered I had, in fact, found a Welsh Love Spoon.

Dating back to the 17th Century, Welsh Love Spoons were tokens of love from a man to woman. The man hand carved the spoon out of a single piece of wood. Complexity and symbols carved spoke of the feelings the man had toward the woman as well as the carver's skills. The spoon I found has a single large heart and a smaller heart above it (presumably where you could hang it or put a small leather thong through to hang it). One heart carved speaks of "true and steadfast love". There are many other symbols and meanings such as:

  • Heart: True and steadfast Love                                   
  • Celtic Cross: Blessing of union/Faith
  • Horseshoe: Good Luck and Happiness               
  • Lock: Security             
  • Harp/Castle: Wales                                        
  • Anchor: Settled Love and security or Stable loving relationship               
  • Links: Lives linked together                                            
  • Bells: Wedding /Anniversaries
  • Key Hole: My house is yours/Living together      
  • Circles: Eternity  
  • Ship's Wheel: Guidance                                     
  • Balls in Cage: The number of Children or years waiting to get married   
I am very pleased to think that someone may have made this for their sweetheart as a token of their love. I will hang this spoon in my kitchen and, I am sure for many years, I will contemplate the carver of this treasure. It just goes to show you that you never know what intriguing mystery you may find in your local thrift store.

Have you ever heard of a Welsh Love Spoon? Do you know of any once popular traditions that you carry on or still embrace? 

Friday, December 6, 2013

Baby It's Cold Outside

This morning temperatures here in the desert are at freezing. Those of you who live in climates where it is cold in the winter probably are not phased by freezing temperatures, but those of us from desert climates who laugh when others complain that temperatures are in the 90's realize that freezing is unusually cold. In Arizona we wrap our plants in sheets, bring our pets in, and make sure to park our cars in the garage. Facebook is a-buzz with folks griping about having to use their heaters.

Thinking about heating a shouse makes me smile, since it is a relatively small area to actually have to heat. I thought I would do a brief post about heating options for those who may be considering living in a Shouse, tiny house, or other small home. This by no means covers all the options, but these are the layers of heat I will be using to ensure a safe and warm home on even the coldest of days.

The first consideration is fuel. If your heat source is only electric, you could put yourself in a very precarious situation. During ice storms and blizzards, power is often lost. Not just lost for an hour or so, but potentially for days. This could be fatal in some instances, so you must consider having an alternative source of heat in cases where electric may be interrupted.

I have four sources of heat for my Shouse: A cool-touch ceramic wall panel (actually 3) for radiant heating, baseboard heaters, and two styles of kerosene heaters.

Radiant Heat Panel
Radiant Heat Panels:  Fuel source: electric. These panels are awesome because they hang on the wall (spacers keep the back from resting on the wall and allows airflow around the panel), plug into a standard outlet, and can be painted to match your decor. They slowly release radiant heat, gently warming the air in a room. These are meant to run constantly and are not able to heat a cold room in a short amount of time. You would use these super efficient panels to supplement the heat in a room or to maintain temperature of an already warm room. They are reasonably priced and can be used for zone heating tasks. Safety is the best thing about these panels as they feel warm to the touch, but typically will not cause a burn.

Baseboard Heater
Baseboard Heat: Fuel: electric Baseboard heaters are a highly effective way to heat a room. They are hard-wired in and throw enough heat to warm a room in a reasonable amount of time. They are thermostatically controlled, so you can adjust just how much heat they produce and for how long. They can be a safety issue around small children because of a potential for burns. Fires can also occur if curtains or other flammable materials were to be touching the unit. These are often a primary source of heat in smaller homes and apartments and are dependable (unless the power goes out).

Vintage Perfection Heater
Modern Kerosene Heater
Kerosene Heat: Fuel: Kerosene Kerosene heaters are popular in the north east. They require refilling and, depending on efficiency and heating requirements, can run for a day or two before requiring refilling. Kerosene heaters throw off a lot of heat! They are typically used to support an inadequate heating system or to supplement heat on days that are extra cold. I have two styles of heater: One is from the early 1900's and is part of the K.I.S.S. principle (keep it simple, stupid) because it is just a wick and kerosene. They are small and portable. The second one is a more modern Kerosene heater with a tank and electronic ignition. It is quite a bit larger and will run longer because of the size of the tank that stores the fuel. It has a wide base and safety cage, making it a little safer than the vintage one (especially around pets and kids). Kerosene fuel is not too expensive and, even when the electric goes out, you can be toasty warm in your tiny abode. Kerosene is safe as long as you follow basic precautions, and you must keep children away from them as they can cause very serious burns. Wicks need to be replaced and maintenance considered. Refilling can be a hassle as it must be done out-of-doors.

Awesome Wood Stove
Wood Heat: Fuel: Wood I have toyed with the idea of a wood stove, but as of right now I will not be adding one. I don't want to take up floor space with something that I will only need part of the year and cannot be stored when I don't need it. I will revisit wood heat as a source once I have spent a winter in the Shouse. The picture to the left shows what I am talking about for the Shouse, but there are many, many styles of wood heaters to select from. Wood is relatively inexpensive, and the stoves throw off a lot of heat. Again, burns are a concern as well as the potential for chimney fires and other types of fires. They require maintenance and cleaning frequently. You still must fetch wood to add to and maintain the fire as well.

The cold front we are feeling the affects of is sweeping across the United States bringing some bitterly cold weather to a good portion of the states. Considering heat is best done before the cold snap hits. What type of heat would you use in a small home? Do you have a method of heating not mentioned here? Share with us in the comments below.

Wednesday, December 4, 2013

Why Are Kitchen Cabinets So Expensive?

I have been, again, putting pencil to paper to "do me some figurin' " about my kitchen cabinets in the Shouse. First I went to visit Pinterest where I found these pictures that got me all excited:


Then I let me fingers do the walking on over to the big box "fix it yourself" store. Holy cow! I can't believe how expensive cabinets are! $300+ per cabinet? Are you kidding me? Ya, that will never do. I need to find a cheaper way. So then I let my fingers take me on over to Craigslist where I searched for "used" cabinets. Ok, that was more reasonable, but many of the cabinets available are still hanging on someone else's walls. They actually want the buyer to do all the work and take them down. Ain't nobody got time for that! The other ones I found were cruddy and I wouldn't want to put a dish or food item in them (ick!). 
Next I thought, "Hey! Flat pack. Surely someone makes them cheaper." 

 I headed on over to IKEA where I discovered A) I don't like their selection and B) they are as overpriced as the big box home improvement store. Ugh! 

What to do? Here is what I am going to do: 


I am going to build them myself. Yes, you read correctly. I am going to build the frames, install shelves, paint the bases, and then hang these doors that I got for an incredibly great price: $30 for all of them! They are solid Maple and made by KraftMaid Cabinets. I plan to build the bases something like this: 


I will then cover them with bead board, paint them an awesome country color, and cover the fridge as well to "blend it" in with the cabinetry. Combined with the slide outs I have already built: 


they will look amazing! After adding the cabinet doors, I plan to only install the cabinets on one wall and on the opposite will be my existing Ethan Allen china cabinet. Considering my dining room set looks like this...


I think it will make a lovely French Country kitchen. You may think this would looks strange, but there is simply no way I am giving up my dining room set. The table currently has two leafs in it, but they can be removed to make a nice round table. The cabinet will store my dishes, serving pieces, flatware, napkins, and tablecloths. When I want to entertain, I can pull out the leafs (stored under the bed) and double the size of the table. This will be a lovely country kitchen to be sure. If you could see the way I see it in my mind's eye, you would agree this will look just lovely in a Shouse. 

So, stay tuned dear reader as I embark on building (pre-building in sections then taking them with me to be installed) my kitchen for the Shouse. I am guessing it will be nowhere near $1200 to build. My best guess is under $500, not including the real butcher-block counter tops I will be installing.

What is your opinion? How would you design your dream Shouse kitchen?


Tuesday, December 3, 2013

Easy Personalized Holiday Gifts - Instajunction to the Rescue

Cuff Links
Looking for a great way to personalize gifts for friends and family this holiday season? Need something special and extra? I discovered www.Instajunction.com and the coolest way to "say it with pictures" this holiday season. If you like personalized gifts and you have an Instagram account, you are in luck. It couldn't be easier to cross names off your shopping list this season, all from the comfort of your computer!

Instajunction (www.Instajunction.com) is a new company that takes photos directly from your Instagram account and creates your custom gift items. I recently had an opportunity to order cuff links for my son for Christmas (shhh) and I couldn't be more pleased. They offer a variety of items you can have made using your Instagram photos so each item is unique and personal.  Here are some of the other items I really like:

  • Coasters
  • Wall Calendars
  • Metal Plates
  • Cling Vinyls
  • Magnets
  • Key Rings
  • Collage Posters
  • And even more! 


So just for you, dear reader, I have arranged a 25% discount on anything you order that is good through December 8, 2013! Just enter the code FRIEND25FR at checkout. Easy, peasy! 

Happy shopping! 

Getting Estimates on Your Shouse

I have been emailing back and forth with the builder of my future Shouse this week. Beverly, their quote guru, has been amazingly patient as I wade through the options available to me. Right now a 12' x 36' building with asphalt shingle roof, 9 windows, a front door with window, and a paint finish is sitting at $8,850. However, Beverly let me know that they can do double-pane vinyl clad windows if I intend to heat and cool the building. Then she mentioned they do insulation and electrical work as well. Now, I know that I want to do a lot, but I am one person and my BF will only be able to spend one week helping me with this great adventure before he has to go home to Washington for his job. Knowing where my budget sits, I sat down with my mighty pencil and began planning out my electrical system so I could get a quote.

Assuming I can keep the budget to under $11,000 it would make the most sense to have them run the electric. The reason? Certification. They would have their sub-contracted electrical person do the work which means code and permits are already covered. It is just another layer of peace of mind on this adventure. Eventually the solar power will be mine to handle hooking up, but since I currently am 1,123 miles away from my new homestead, having the building built with the better windows, insulation, and having the electrical pre-run makes the most sense. However, that being said, if it pushes past my allotted budget, then I will be doing the work by myself, which I don't mind doing, but may not have help for portions of, which could be an arduous process. If I lived with my partner or I was building the tiny house in my driveway over time, no biggie, but I have to be realistic to my goals.

Beverly has been wonderfully patient about answering the many questions I have been asking, which is very helpful. I have to be honest, this is a big chunk of change for anyone to spend and had her response to my questions been indifferent or clouded with irritation, I would have immediately found another builder. If your builder doesn't want to work with you, that is a sign. Here are just some of the questions I have lobbed in her direction:
1. Is a metal roof better than an asphalt one in OK? Here in Arizona it makes sense, but a friend recently pointed out that hail damage may be more severe on a metal roof. What is your opinion?

2. I see on your website that insulation and electric can be installed. Is this a parts plus hourly labor charge or do you have a flat fee you quote based on the size of the building and what the customer needs?
  
3. What are the clearance measurements for the lofts? Is there a weight limitation? 
  
4.  What is the order to delivery time frame? 
  
5.  I would like one more quote please for the following: 
·         12 x 36
·         1 loft measuring 12' x 12' , the other loft left as standard
·         (5) 2' x 3' windows
·         (4) 3' x 3' windows
·         9 Lite Door (replace double door with 9 lite door)
·         Painted finish
 
6. Do you offer a discount if the building is paid for in cash as opposed to financing? 
And my latest quote request:  ·         I need a  quote for the building we quoted last: 12 x 36, painted, same number of windows, shingle roof, plus:

·         Insulation: entire building
·         Windows: double-pane vinyl windows
·         Electric to include:   3 GFCI receptacles (kitchen and bath), 10  standard receptacles (3 in large loft, 2 in standard loft, the rest downstairs), 1 stove receptacle (50 amp), 1 dryer receptacle (30 amp), 1 porch light on single pole switch,  3 three-way switches, 3 light boxes, 1 ceiling fan box with a single pole switch, wiring on a separate circuit for a window a/c unit, wiring on a separate circuit for two baseboard heaters (500 watt each), and one outdoor weather proof receptacle.
*When it comes time to actually wire it, I can send you info on where I want each one, but for now a general quote would be helpful. This applies to window placement as well.

So my advice to you if you are considering building a Shouse is:

  1. Ask lots of questions. 
  2. Put pencil to paper and make lists. 
  3. Have a clear vision of what the end product should look like. 
  4. Know what your budget is.
  5. Know your lead time. Don't wait until the last minute to make changes or upgrades.
  6. Know the building code in your area. 
  7. Find a builder who wants to work with you.
  8. Be realistic to your abilities and situation. (I know I can do it by myself, but in this case is that wisest or most practical?)
  9. What is safest? Know your limitations. 
I will leave you with a quote from a bulletin board forum I was doing some research on last night: 

"The time to learn to install electric properly is not after the firetrucks drive away."

Amen to that!


Monday, December 2, 2013

A Great Cup of Coffee Without the Barista Cost


I think I slept for about an hour last night. First I couldn't get my brain to shut down and rest, then my cat decided it was a great night to walk around and meow. I am exhausted and at 4:45 am I finally decided it was time to just get up and get a head start on my day. Like many Americans, and many others worldwide, I start my morning with a nice hot cup of coffee.

Now coffee is one of those things that everyone has an opinion on. You either love it or hate it, with cream or without cream, sugar or sweetener, blah, blah, blah. In fact, I was recently in Seattle which is supposed to be coffee Mecca and I was not anymore impressed with the coffee there than the pot that comes out of my Bunn coffee maker each morning. Ironically the pot I make in my kitchen often is brewed faster than the one by the Barista in the snotty coffee bar.

Here is the trick to how I make my morning cup-of-joe even better:

Add one Cinnamon stick.*


Yes, a stick of Cinnamon. Cinnamon is actually the bark of a tree. Did you know that? The bark is shaved off and as it dries it curls up into what the industry calls quills, we know so well in America as sticks. I take one of these nice sticks and drop it into the empty carafe. As the coffee brews and fills up the carafe, the Cinnamon is slowly leached out into the freshly brewed coffee. I can recycle one quill for two separate pots of coffee. I haven't tried for a third, but I just may. After it is spent, I make sure to add it to my compost pile.

You would think this would create a very strongly Cinnamon flavored coffee, but it is quite the contrary. The Cinnamon makes the coffee smell even more amazing, as if that is even possible, and ads a subtle Cinnamon flavor. This is not a hot Cinnamon flavor, but a gentle touch that is difficult to describe, but amazing none-the-less. Sometimes coffee is really hard on my stomach, but I have found the coffee with Cinnamon doesn't seem to have the same harsh effect. Oh, and if you are like me and live alone so that a pot of coffee often doesn't get finished, I have discovered that the coffee doesn't turn bitter from being on the warmer longer. I have even heated up a cold pot on the stove with great success!

So I share this tip with you, dear reader, because I think you will find this simple tweak to your morning cup-of-joe to be as pleasurable as I. Bottoms up!

*As a reader pointed out, not all "Cinnamon Sticks" are real Cinnamon sticks. I buy mine in bulk on Amazon, but you can also get them from McCormick spices and store label brands too in the spice isle of your local market.

Sunday, December 1, 2013

Mason Jar Monday - Color Coded Cheese Shaker Hack


Today's Mason Jar Monday is just a tweak on an old favorite: Using cheese shaker lids from store brand cheese on mason jars. Now anyone who enjoys canning jars or uses Pinterest has probably seen this idea before, but while I was pouring my new container of cheese into a new jar because it was 3 Cheese Blend instead of Parmesan, which I already had, I noticed the lid colors were different:

I decided to take this discovery a step further and choose different jar shapes. 


The great thing about this old trick is that the lids have a shaker side and a spoon/pour side. 


I planned to use canning labels to identify them still, but since I will almost always have these in my refrigerator, I decided to make labels that are permanent and can be washed when I wash the jar. Since I like to cross stitch (easy projects, not big fancy pictures, ugh!), I purchased plastic cross stitch plastic canvas and stitched labels for both. I sewed them to a circle of elastic I can easily slide on and off. I think they turned out rather nice: 


So there you have it, Mason Jar Monday's Cheese Shaker hack. Have a great week!