Showing posts with label recipe. Show all posts

Saturday, July 9, 2016

Sweet Roll French Toast Bake

It's summer and we are at that point where we have all of our hens laying and a plethora of eggs to use. We share our eggs, preserve our eggs, devil our eggs, pickle our eggs, but still we are left with plenty to be used up. We try to come up with creative meals using our delicious, fresh eggs.

Tonight's supper needed to be quick and yummy. I stood in front of the fridge and glanced to the pantry. What could I make that would use up some of the leftovers so nothing would be wasted? I found I had a partial package of King's Hawaiian Rolls left over from a recent barbecue. King's Hawaiian Rolls™ are soft, sweet, and delicious. Contemplating the 4 rolls left in the package, I decided on making a Sweet Roll French Toast Bake.  It was a win-win to marry the rolls and the eggs into a simple and delicious dinner, but I suspect I will be making this again for breakfast or brunch at some point!


Doesn't it look delicious? It is super easy to make:

Ingredients: 


  • Left over rolls (in this case I had 4 King's Hawaiian Sweet Rolls™, but there are other brands, and, hey, you can buy rolls just for this purpose and even make an entire bag to feed a large family or crowd)
  • 6-12 eggs (more rolls = more eggs)
  • 1/2 Tsp. Cinnamon
  • Salt & Pepper 
  • Maple or Pancake Syrup
  • Powdered Sugar
  • Cooking Spray
  • 8 X 8 Pan (or whatever you have on hand)


Instructions: 
  1. Preheat oven to 350 degrees
  2. Spray pan with no stick spray. I used an 8x8x2 pan, but you can use whatever size is convenient for the number of rolls you have left. I had a space in the middle I filled with an unbeaten egg. 
  3. Split the rolls horizontally so you have a top piece and a bottom piece. Lay these in the pan forming one layer. 
  4. Crack all the eggs into a bowl, add salt, pepper, and cinnamon. Beat with a fork gently. 
  5. Pour mixture over the bread. I made sure I had enough eggs to cover the bread. 
  6. Use a fork to turn each section of roll over. The ensures the bread is completely covered in egg and absorbs the mixture. 
  7. Bake in the oven at 350 until the egg is cooked. (Rolls will still be somewhat soft. Cook a full egg in the middle gives an easy visual of how cooked the bake is. It took 15 minutes for me.)
  8. Serve up on plates, add syrup, and lightly sprinkle with powdered sugar. 
Needless to say, there were no leftovers after this meal. This would make a great dish for brunch or holiday mornings when feeding a crowd of people as well. Add bacon and a yogurt bar for a quick and easy holiday breakfast. Or, just do like we did and enjoy breakfast for dinner!

Enjoy!


Monday, March 7, 2016

3 Packet Slow Cooker Pot Roast

Creating a wholesome dinner has never been easier than when using slow cooker. I love my slow cooker because I come home after a long day to a house that smells wonderful. I can sit down to relax and enjoy a meal without any muss or fuss. 

My good friend and neighbor, Chrissa, shared this simple recipe for a wonderful roast that tastes amazing. This roast is fall-off-the-bone tender. You can add carrots, onions, potatoes, whatever you want. Make a large roast or a small one, either way you can't loose. Make a large roast and freeze some for a later meal. This recipe is great for cheaper cuts of meat and will help stretch your grocery budget. Enjoy!


Ingredients: 

1 Ranch Dressing Packet
1 Brown Gravy Packet
1 Taco Seasoning Packet
2 tbs Oil 
1 Roast
Vegetables such as carrots, potatoes, onion, etc.

Add a Liner to Your Slow Cooker
1. Line your slow cooker with a slow cooker liner. This makes clean up a breeze!

Sear the Meat
2. Sear the beef using in two tablespoons of oil. 
3. Add any fresh carrots, potatoes, and onions  you want to the bottom of the slow cooker. Use fresh, uncooked vegetables. 

Sprinkle Packets on Meet. No Water Needed.
4. Place the roast on top of the veggies. 
5. Sprinkle the 3 packets on top of the seared roast. No water is needed. 
6. Cover with lid.
7. Cook until the meet falls apart.


This method makes an amazingly seasoned roast. Plus it is just so simple! I buy seasoning packets when they are on sale and keep them in my pantry. I also try to buy meat when there is a good sale. This meal is budget friendly and delicious. 

I love an easy meal that is filling and wholesome. Thanks Chrissa!


Sunday, May 3, 2015

Quick and Easy Basil Pesto

It is the time of year where we begin planting our gardens and dreaming of the bounty of fresh vegetables and herbs it will produce. There is nothing like the taste of what your garden produces. I am a big fan of fresh herbs and Pesto sauce is one of the most tasty ways to use Basil. Planted correctly and happy, Basil will produce prolifically. During the hot months of summer, Basil Pesto helps make a light and flavorful pasta dish sure to please. Making Pesto is a snap and it will be a huge savings to your budget if you make your own vs purchasing it at the market. Pesto can be made without a blender, but will go much better if you use a blender or food processor. If you have a bullet-style blender, you can make smaller batches or add a little of the basil at a time.

Monday, March 30, 2015

Mason Jar Monday Arizona Ice Tea Mimic

Welcome to Mason Jar Monday!

Today’s Mason Jar Monday is a great mimic recipe. The weather is turning. More of us are out working in the gardens, doing yard work, and having BBQ’s and gatherings. Today I offer you a great recipe to mimic Arizona Ice Tea. I love Arizona Ice Tea, but the cost is a little high for my budget. This is a budget-friendly way to make a very close ice tea that you would be hard-pressed to identify as a mimic in a taste test.

Let’s start with the ingredients. Gather together:
  • 8 cups of boiling hot water
  • 1 Lipton Green Tea Bag
  • ½ cup of Sugar (more or less to taste)
  • 2 Tablespoons of local honey
  • 2 ½ Tablespoons of Lemon Juice (again, to taste. I like a little more)
  • ¼ Tablespoon of Ginseng extract 

How to: Steep the tea bag in the hot water for about an hour. During this time the liquid will cool. After an hour, remove the tea bag and add the remaining ingredients. I make it in a bottle with a lid (I reuse an old Arizona Ice Tea jug). Give the ingredients a good shake (or stir) and then serve over ice.

Store: Store in the refrigerator. It will keep in the fridge for a week or so, but it never lasts that long in my house.

Serve: I prefer to serve my Arizona Ice Tea in Mason Jars with a Slice of Lemon on the rim and sprig of fresh mint.


Cool and refreshing for just pennies, this mimic of Arizona Ice Tea is super easy to make so you never run out at home! 

Sunday, November 30, 2014

DIY Granola Breakfast Cookie Bars

I love granola bars but continue to be astounded by how much they sell for at the market. I think it is definitely more frugal to make your own. Super easy, I cut the bars into the size I like and then package them in zippy bags then store in an airtight container (if you think they won't be gobbled up). Convenient for those on the go, a quick meal for kids before they head off to school, pack them in a lunch bag, etc. You can't go wrong with a healthy home-made granola breakfast bar!


Ingredients: 

1 1/2 cups Bisquick (or a clone if you make your own)
1 1/2 cups quick-cooking oats
1 cup brown sugar (packed, add a little extra to taste if necessary)
2/3 cup butter, softened but not melted1 egg1/2 cup dried fruit of your choice, chopped
1/3 cup chopped nuts
1 tsp Vanilla
Variations:  1/3 c. powered milk for a breakfast bar
1/3 cup  mini chocolate chips


The ingredients are easily found and economical

Preheat oven to 350 degrees. Mix all until well blended. Press mixture evenly in un-greased rectangular pan, cookie sheet, etc. A round pan will allow you to make "pizza slices" for bars.


Drop the dough on the pan and spread to a 1/2" thickness
Bake until mixture is firm and appears dry on the surface, not shiny from the butter.

Allow to cool to warm and then cut into even size bars.
Bake 15-17 minutes and then cut into bars while still warm. Store in a zip bag to keep fresh  store in an airtight container.


These bars have dried cherries. Yum!

I love to grab one of these with my travel mug on the way out the door in the morning. Easy to make and relatively healthy, you can't beat a granola cookie bar with no preservatives. 

Saturday, November 15, 2014

Cold Weather Beef Stew Homestead Style

All ingredients are in the crock pot.
Now to slow cook all day.
Summer is over. Officially over. Our highs this week hovered around freezing. Thursday the weather reporters put out the word a hard frost was heading our way. That means get the rest of the vegetables out of the garden. My good friend Sharon and her husband brought me a bunch of produce from their garden. I am so grateful that my friends think of me when they have extra bounty. There is nothing quite as good as home-grown fruits and vegetables. Today I am using the rest of the green beans up by adding them to my stew. The great thing about stew is that you can add this and that, customizing your stew each time you make it.


Here is my recipe for a good, hearty winter stew:

1 lb Small Red Potatoes
1 lb Bag of Baby Carrots
1 - 2 Onions, chopped
1.5 lbs Stew Beef
1 10 oz can chopped Tomato (or add fresh if you have them)
6 teaspoons of Beef Bullion
1/2 cup Lima Beans or peas
1 handful of string beans, cut into sections
Herbs of your choice (Rosemary is one of my favorites)
Salt and Pepper to taste

Brown the meat. Add it and all the ingredients to the crock pot and cover with water. Give it a stir with a wooden spoon and let her slow cook all day.  Enjoy the lovely aroma of warm and hearty food cooking.

Just before serving add a thickener if so desired. I add a 1/2 cup of water mixed with corn starch to thicken my stew, but I have also added powdered/freeze dried mash potato flakes (as is my plan tonight). Serve with warm biscuits or fresh, hot bread with butter.

Winter is the perfect time to experiment with hearty and filling foods. It can only get better when you are using fresh veggies from the recent harvest.

Stay warm!!


Sunday, October 5, 2014

Racho Recipe: Black Eyed Pea Salad

Black Eyed Pea Salad
I had this wonderful Black Eye Pea Salad at a potluck recently at my job. I instantly fell in love with it and had to ask for the recipe. Who knew it could be so easy to make? I could not resist sharing the recipe with you here. This salad is nutritious and easy to make. Filling and inexpensive, this makes a fantastic side dish and I like to take the left-overs (if there is any) for lunch the next day. This salad would make a great dish for Meatless Mondays.

Monday, April 14, 2014

Mason Jar Monday - Tabbouleh to Go

 Easy meals in Mason Jars are one of my staples. I love being able to grab one from the fridge on the way out the door in the morning. It makes life so much easier when the recipe is quick and easy too. Tabbouleh is a salad of Arabic origins. The ingredients are simple and healthy and the salad is fantastic on hot summer days when cooking something hot is the last thing you want. Prepare a weeks worth in advance for easy lunches or for side dishes at dinner. Enjoy!


Sunday, January 12, 2014

Food Smells and Memory Triggers - A Walk Down Memory Lane

Homemade Pretzels, yum!
Today was a typical Sunday in January. That, in my world, means cool weather, lazy Sundays, and football. I got kinda "snacky" earlier and was craving the staple food familiar to all of those who hail from Philadelphia: The soft pretzel. I wandered out to the kitchen an whipped up a batch of homemade pretzels. And while they were good, they are definitely not Philadelphia soft pretzels.

It is funny how certain smells totally transport me back to my youth and some of the more memorable, yet everyday, events in my life. The smell of bleach and Tide combined with moist earth was the distinct smell of my grandmother's basement. It was such a unique smell that I am only blessed with wisps of it on very rainy or humid days. When I was growing up my parents would take us to football, baseball, and hockey games as well as to the more cultural things of theater and concerts. As we would drive out to south Philly, whenever we would get stopped at a red light, you could count on a guy standing in the median selling soft pretzels. Now I don't know if they do that anymore down by the stadiums, but when I was a kid we lived for those soft pretzels with tangy yellow mustard. We also liked to buy dill pickles out of a barrel at the deli, but those I know are gone. My son and my granddaughter never got the joy of fishing out their own crispy dill pickle to wrap in a piece of paper and snack on all the way home from the deli. Pickles in a jar are just not the same.

Baking these pretzels today took me back in time for sure. It was a bittersweet walk down memory lane. How about you? Do food smells transport you back in time?

Here is the recipe for my pretzels. Keep in mind, this is my recipe, not a chef's and they certainly don't even come close to the ones in Philly, but they will sure do in a pinch!

Rancho No Dinero's Soft Pretzels

  • 2 packets of Yeast 
  • 1 1/2 cups warm (not hot, but warm) water 
  • 5 cups flour
  • 3 tablespoons of sugar
  • 2 teaspoons salt
  • Garlic powder 
  • butter (melted)


Using a dough hook on your mixer, add the water and the yeast to the mixing bowl. Give it a stir. Let stand for 5 minutes. Add the sugar and mix. Let stand 5 minutes. Add 3 cups of the flour and the salt to the bowl. Start the hook to give it a stir. Add the rest of the flour. Let the mixer do the work for 3 -5 minutes.

Remove the dough from the bowl and put it on a floured surface. Knead for 3 minutes. Cut up into even chunks (I did 12 and used my crinkle fry cutter). Roll each chunk out into a long rope and form into pretzel shape.* Put on a greased or, like I did, lay them on parchment paper. Brush on the melted butter and sprinkle with salt and garlic powder.

Bake in an oven at 450 for 8 - 20 min (depending on how thick they are). You want them to turn a golden color, but not be hard as a rock. Sometimes slightly under cooked is better than over cooked.

Serve with mustard or butter, depending on your tastes. Dipping it in cheese sauce is a good way to eat them too.

Enjoy!


*if you have baking soda, add half a cup to a saucer of water and bring to a boil. Drop each pretzel into the water for 30 - 45 seconds and then drain before putting on cookie sheet or parchment paper. Then do the butter step.

Saturday, January 11, 2014

Small Batch Cooking - Just Enough For One or Two

Click here to purchase through Amazon
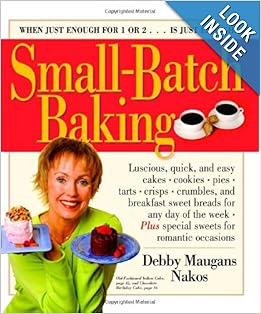
I live alone. Well, not exactly alone. I do have a cat and a dog, and occasionally my boyfriend flies in from Seattle, but for the most part, I live alone. One of the biggest complaints I hear from friends, and one that I make as well, is that cooking for one stinks. The main complaint is that if you cook more than you need for a meal or two, you feel compelled to eat it anyway, even if you are full or really shouldn't eat more. I was raised not to waste food. As a result, it sits on my waist. Do you know what I am talking about? Are you guilty of it too? I think I may have found a cookbook that you may want to own as well!

Debby Maugans Nakos has written a pioneering cookbook aptly entitled: Small-Batch Baking. She has taken everyday baked-good's recipes for foods like cookies, cake, pies, tarts, crisps, crumbles, and sweetbreads, and rewritten them to make make, well like the title says, small batches. Such a brilliant concept!

Each recipe is "just enough" for one or two people, with no risk of left-overs. Instead of measuring your ingredients in cups, recipes are measured in tablespoons. Scaled down pans create the beautiful shape of the bunt cake we have all come to love so well, but instead of being 10 servings or more, you get two. There are simple recipes for muffins, but also fancier recipes such as Creme Brulee. The cookbook has 225 fantastic recipes to choose from. Breakfast and desert have never been better!

I found this book on Amazon for $13.95, but actually purchased it on Ebay for less than $5 including shipping! It is published by Workman Publishing, NY, ISBN#0-7611-3035-7. Another great thing about this book is it is sized smaller than a typical cookbook. This will make it convenient to store in my Shouse kitchen.

If you like to cook, enjoy baked goods, and, like me, have little self control, check out this cookbook! I like it so much I gave them as gifts this past holiday season. Oh, I don't want to forget to mention that Debby also has a Gluten-Free version AND a chocolate lovers version. Yum!

Sunday, December 8, 2013

Mason Jar Monday - Easy Pasta Salad for a Quick Meal

Happy Mason Jar Monday! Today's Mason jar idea is actually a quick, easy, and economical meal option that you cook up and store in a Mason jar. You can make enough to have a quick lunch for a week or you can serve it as a side dish.

This dish most likely can be made from items you already have on hand. Servings cost less than a dollar! Also, this is quick. Cooking time is around 9 minutes (follow the box for the pasta you choose) and it just needs to chill for a bit in the fridge. So simple!


You will need:
Elbow Macaroni or Mini Penne Pasta
Salad Dressing of Your Choice (I like to use Ranch or Balsamic Vinaigrette)
Shredded Cheese
Salt and Pepper
Yum! 
Directions:

  1. Cook your pasta following the directions on the package
  2. Drain it well and rinse with cold running water. While macaroni is still in the colander, use a spoon to stir the pasta to allow water caught up in the hollow part of the macaroni to drain.
  3. Add 1 tablespoon of dressing for every 1 cup of pasta. You can add more or less to taste, but I found this ratio to work pretty well. 
  4. Shake a little cheese on there and add salt and pepper to taste. 
  5. Stir it up well. 
  6. Spoon into jars, put on a lid, and chill in the refrigerator for at least an hour before serving.

Store up to one week in the refrigerator.

Do you have an easy recipe you would like to share? Share it in the comments below!

Monday, December 2, 2013

A Great Cup of Coffee Without the Barista Cost


I think I slept for about an hour last night. First I couldn't get my brain to shut down and rest, then my cat decided it was a great night to walk around and meow. I am exhausted and at 4:45 am I finally decided it was time to just get up and get a head start on my day. Like many Americans, and many others worldwide, I start my morning with a nice hot cup of coffee.

Now coffee is one of those things that everyone has an opinion on. You either love it or hate it, with cream or without cream, sugar or sweetener, blah, blah, blah. In fact, I was recently in Seattle which is supposed to be coffee Mecca and I was not anymore impressed with the coffee there than the pot that comes out of my Bunn coffee maker each morning. Ironically the pot I make in my kitchen often is brewed faster than the one by the Barista in the snotty coffee bar.

Here is the trick to how I make my morning cup-of-joe even better:

Add one Cinnamon stick.*


Yes, a stick of Cinnamon. Cinnamon is actually the bark of a tree. Did you know that? The bark is shaved off and as it dries it curls up into what the industry calls quills, we know so well in America as sticks. I take one of these nice sticks and drop it into the empty carafe. As the coffee brews and fills up the carafe, the Cinnamon is slowly leached out into the freshly brewed coffee. I can recycle one quill for two separate pots of coffee. I haven't tried for a third, but I just may. After it is spent, I make sure to add it to my compost pile.

You would think this would create a very strongly Cinnamon flavored coffee, but it is quite the contrary. The Cinnamon makes the coffee smell even more amazing, as if that is even possible, and ads a subtle Cinnamon flavor. This is not a hot Cinnamon flavor, but a gentle touch that is difficult to describe, but amazing none-the-less. Sometimes coffee is really hard on my stomach, but I have found the coffee with Cinnamon doesn't seem to have the same harsh effect. Oh, and if you are like me and live alone so that a pot of coffee often doesn't get finished, I have discovered that the coffee doesn't turn bitter from being on the warmer longer. I have even heated up a cold pot on the stove with great success!

So I share this tip with you, dear reader, because I think you will find this simple tweak to your morning cup-of-joe to be as pleasurable as I. Bottoms up!

*As a reader pointed out, not all "Cinnamon Sticks" are real Cinnamon sticks. I buy mine in bulk on Amazon, but you can also get them from McCormick spices and store label brands too in the spice isle of your local market.

Sunday, September 1, 2013

Slow Cooker Sunday: Lunch for a Week Under 20 Dollars - Chicken Teriyaki

I really hate having to pack lunch for work, but more than that, I hate paying $5 to $7 per lunch when I run to grab something because I am hungry as heck by 12:15 each day. I found a recipe floating around on Facebook for Chicken Teriyaki in a slow cooker and gave it a try. It was pretty good, but I modified it and changed it to make a new recipe I prefer. Total cost for ingredients is under $20 and it makes enough servings for 7 entire days worth of lunch or dinner. I partner it with rice and some fresh pineapple. I also prepare it on Sunday, put it in individual serving containers in my refrigerator and grab one each morning. Lunch could not be any easier in my world.

Rancho No Dinero Slow Cooker Teriyaki Chicken


  • 1 Large Can Pineapple Juice
  • 8oz Soy Sauce (You could try low sodium, I haven't yet)
  • 1 Cup Brown Sugar
  • Ginger and Garlic (to taste, not necessary)
  • 6 Good Size Chicken Breasts (I use organic)


In your slow cooker crock add juice, soy sauce, and sugar along with ginger and/or garlic. Give it a stir. Add the chicken breasts. Put on the lid. Slow cook for 5 - 7 hours (when chicken breasts shred or fall apart I consider them done. Cook to the texture you like.).


Makes 5 - 7 servings.

Wednesday, July 3, 2013

Puttin' By - Home Made Rice-A-Roni

Mix in the Jar
Lily's Dinner
I am a big fan of provident living or, as I call it, puttin' by. I believe that preserving part of the harvest and planning for lean times in advance is just wise living. I poke around the web frequently for recipes to help with variety in my pantry. I came across Lynn's Kitchen Adventures where Lynn had experimented with different recipes to make your own "Rice-A-Roni" like side dish.

Loving Dinner!
I mixed up a batch, but only had half the amount of chicken bouillon that the recipe called for, so I added half beef builion to it. I cooked it up tonight when we had Bunless Onion Burgers and Pasta Salad. My granddaughter could not get enough! I have to say, it was very good. It only takes 1 cup of the mix to make side dishes for 4. I made enough of the mix to make two full quart canning jars. I vacuumed out the oxygen from one of the jars and (dropped an oxygen absorber in there too) and kept the other unsealed to use it first.